What Cleans Headlights On Cars: 2026 Best Methods Guide
Foggy, yellowed headlights can be restored using baking soda, toothpaste, vinegar, or dedicated headlight restoration kits for clear results.
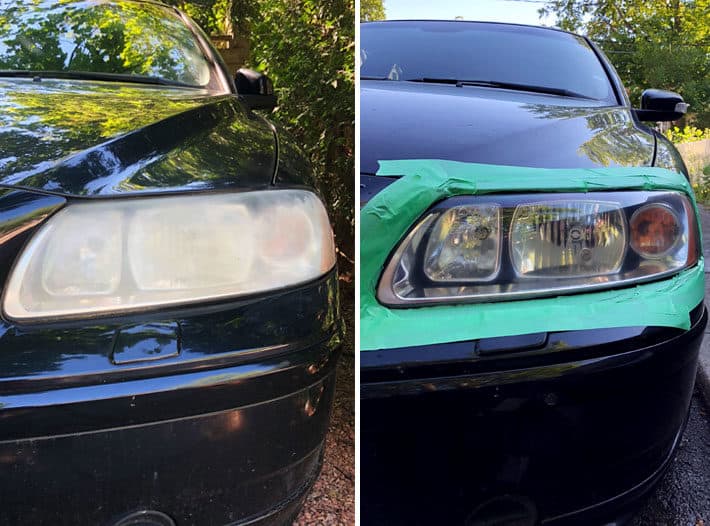
If you have ever driven at night and felt like your headlights were barely doing their job, you are not alone. Cloudy headlights are one of the most common cosmetic and safety issues on older cars. The good news is that figuring out what cleans headlights on cars does not require a mechanic or expensive tools. With the right approach, you can bring back that crystal clear shine and improve nighttime visibility in just an hour or two. Let me walk you through exactly what works, what does not, and how to do it like a pro.
Why Headlights Get Cloudy in the First Place
Before jumping into cleaning methods, it helps to understand why headlights turn hazy in the first place. Most modern headlights are made from polycarbonate plastic, which is strong but porous at a microscopic level. Over time, UV rays, road debris, bug splatter, and oxidation break down the outer clear coat. That is when you start seeing that yellow or foggy film that dulls your light output. In some cases, the inside of the lens can also fog up due to moisture intrusion, but that is a different problem requiring a different fix.
The Science Behind Oxidation
Think of your headlight lens like a pair of sunglasses left out in the sun. The UV exposure slowly degrades the protective coating, leaving the plastic exposed to oxygen and contaminants. Once that outer layer breaks down, light scatters instead of projecting forward, which reduces visibility and makes your car look older than it really is.
Common Household Products That Clean Headlights
You might be surprised how many items sitting in your kitchen or garage can do a solid job. I have personally tested most of these over the years on different cars, and here is the honest breakdown.
Baking Soda Paste
Baking soda is a mild abrasive, which makes it great for removing surface oxidation without scratching the plastic.
- Mix two tablespoons of baking soda with one tablespoon of water to form a thick paste.
- Apply it to the lens using a soft cloth or sponge.
- Rub in circular motions for about three to five minutes.
- Rinse with clean water and dry with a microfiber towel.
This method works best on lightly foggy headlights. If the cloudiness is severe, you may need something stronger.
Toothpaste (Not Gel)
Regular white toothpaste contains fine abrasives similar to baking soda. It is one of the oldest DIY tricks in the book, and it actually works.
- Squeeze a generous amount onto a damp cloth.
- Rub the headlight firmly in small circles.
- Keep going until you see the haze lifting.
- Wipe clean and buff dry.
One tip from experience. Avoid gel toothpaste because it does not have the same grit. Also, do not skip the rinsing step. Leftover residue can dry into a film that is harder to remove.
Vinegar and Baking Soda Combo
This is the classic science fair reaction, and it does help lift grime off plastic.
- Spray white vinegar directly onto the headlight.
- Sprinkle baking soda over the vinegar while it foams.
- Use a cloth to scrub the lens once the reaction slows.
- Rinse thoroughly and dry.
The fizzing action helps break down mineral deposits and surface dirt, but it is not strong enough for heavy oxidation on its own.
Magic Eraser
A melamine foam sponge like Mr. Clean Magic Eraser can work wonders on plastic surfaces. It acts like an ultra-fine sandpaper that buffs away oxidation without much elbow grease.
- Dampen the sponge with water.
- Gently scrub the headlight lens in straight lines, not circles.
- Wipe dry and check your progress.
Be careful not to press too hard. You do not want to leave micro scratches that scatter light even more.
Commercial Headlight Cleaners and Restoration Kits
If household products are not cutting it, the next step is a dedicated headlight restoration kit. These usually include sandpaper in multiple grits, a polishing compound, and a UV sealant.
What Comes in a Typical Kit
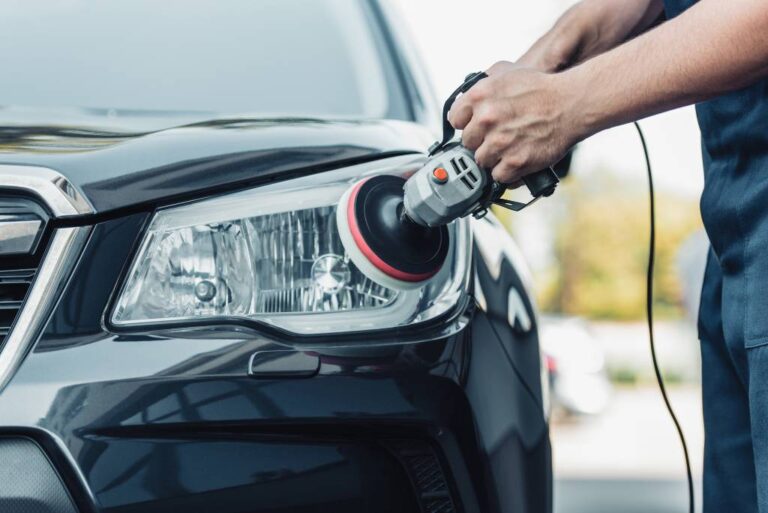
Most kits include 400, 800, 1500, and 2000 grit sandpaper, a rubbing compound, a polish, and either a spray-on or wipe-on UV clear coat. Some premium kits also include a buffing pad that attaches to a drill.
Step by Step Restoration Process
- Clean the headlight with soap and water, then dry it completely.
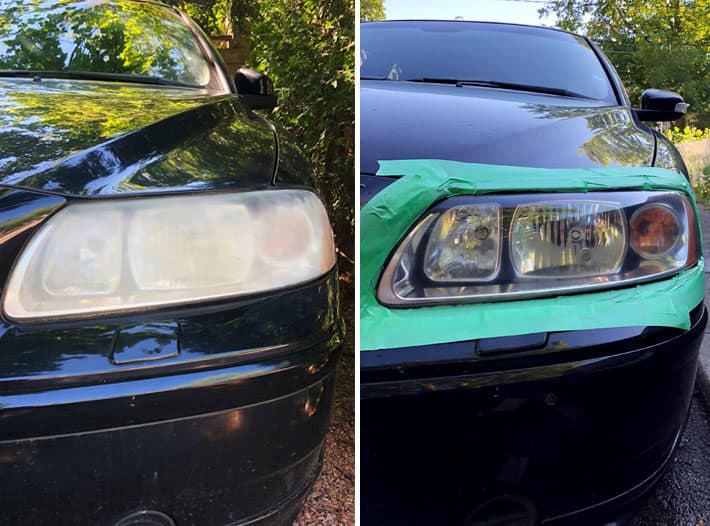
- Tape off the surrounding paint with automotive masking tape to protect it.
- Wet sand the lens starting with 400 grit, keeping the surface lubricated.
- Move up to 800, then 1500, then 2000 grit, rinsing between each step.
- Apply the rubbing compound and buff until clear.
- Finish with the polish for extra shine.
- Seal everything with the UV protective coating to prevent future oxidation.
I have done this on my own daily driver and a few customer cars, and the difference is night and day. After sealing, the headlights look almost brand new, and you can actually see the bulb reflector inside again.
Popular Products Worth Considering
If you do not want to buy a full kit, standalone headlight cleaning sprays and wipes offer a middle ground. They are less abrasive, easier to apply, and great for routine maintenance. Just remember that sprays clean the surface but rarely fix deep oxidation the way sanding does.
What to Avoid When Cleaning Headlights
Not every method you see online is safe. Some can actually damage your lenses or paint.
- Avoid using harsh chemicals like acetone or bleach. They can permanently haze or discolor the plastic.
- Do not use rough scrub pads like steel wool. They leave scratches that make glare worse at night.
- Skip car wax as a long term fix. It may shine the lens temporarily, but it will wash off quickly and does not protect against UV rays.
- Be cautious with power tools if you are inexperienced. A drill buffer at high speed can burn the plastic if held in one spot too long.
How to Keep Headlights Clear After Cleaning
Cleaning is only half the battle. If you do not protect the lens afterward, the haze will come back within a few months.
Apply a UV Sealant
Every restoration kit includes one for a reason. UV protection is what keeps polycarbonate plastic from oxidizing again. You can also buy spray-on UV clear coats separately for touch ups.
Park in the Shade When Possible
Garage parking or covered parking dramatically slows down UV damage. If that is not an option, a car cover adds extra protection.
Clean Them Regularly
A quick wash with automotive soap and a microfiber mitt every couple of weeks keeps road film from building up. Think of it like brushing your teeth. A little upkeep prevents big problems later.
How Often Should You Restore Headlights?
There is no one size fits all answer, but here is a rough guideline based on real world experience.
- Light haze can often be cleaned every six to twelve months with spray products.
- Moderate oxidation usually needs a full restoration every one to three years.
- Severe yellowing may require sanding more than once, plus a fresh seal coat.
If you drive a lot in sunny climates like Arizona or Florida, expect the cycle to be on the shorter end because UV exposure is the biggest factor.
Safety Benefits of Clean Headlights
This is the part most DIY guides skip, and it is honestly the most important reason to clean your headlights. Dirty or hazy headlights can cut your light output by 50 percent or more. That means less reaction time at night, poorer visibility in rain, and a higher chance of not being seen by oncoming drivers. Cleaning your headlights is not just about looks. It is a real safety upgrade.
Legal Considerations
In some states, severely cloudy headlights can actually fail a safety inspection. Keeping them clear helps you stay road legal and avoids tickets in places that enforce equipment standards.
Frequently Asked Questions
Does toothpaste really clean headlights?
Yes, regular white toothpaste works as a mild abrasive to remove light oxidation from plastic headlight lenses. It is best for early stage cloudiness and should be followed by a UV sealant for lasting results.
Can you use WD-40 to clean headlights?
WD-40 can temporarily improve the appearance of foggy headlights by adding shine and pushing out moisture, but it does not actually remove oxidation. It also washes off quickly, so it is not a long term solution.
What is the best product for restoring headlights?
Kits that include multiple grits of sandpaper, a polishing compound, and a UV sealant tend to deliver the most professional results. Standalone sprays work for maintenance but rarely fix heavy haze.
How long do headlight restorations last?
A proper restoration with sanding and a UV sealant can last two to three years or more. Without UV protection, the haze usually returns within a few months.
Is it worth paying a professional to restore headlights?
If your lenses are severely oxidized or you are not comfortable sanding and polishing, a professional detail shop can do it for around 75 to 150 dollars per pair. For most car owners, the DIY route is just as effective and much cheaper.
Wrapping Up
Cleaning your headlights is one of the most satisfying and affordable car maintenance tasks you can do. Whether you grab baking soda from the pantry or invest in a full restoration kit, the goal is the same. Clear lenses, safer night driving, and a car that looks years younger. Start with a gentle method, work your way up if needed, and always finish with UV protection. You will see the difference the first time you hit a dark road, and so will everyone driving toward you. If you have a favorite method or a before and after story, drop it in the comments. I love hearing what works for other drivers.