What Is a Wet Vacuum Cleaner in 2026 (That Actually Work)
You've probably experienced that sinking feeling after a spill, juice on the carpet, a tipped-over drink, or maybe even a minor plumbing leak. Grabbing your regular vacuum to tackle it feels like the obvious first step, but that can quickly lead to a costly mistake. Standard vacuums simply aren't designed to handle liquids safely, and you could end up with a damaged appliance or worse.
A wet vacuum cleaner, however, is a specialized tool built for these very situations. Unlike its dry-only counterpart, this appliance can safely suck up water and other liquids, alongside dry debris. As of 2026, manufacturer specifications confirm that many reliable wet/dry vacuum models offer robust motor protection systems, preventing liquid ingress that would ruin a conventional vacuum.
Quick Answer: The Spill-Proof Vacuum
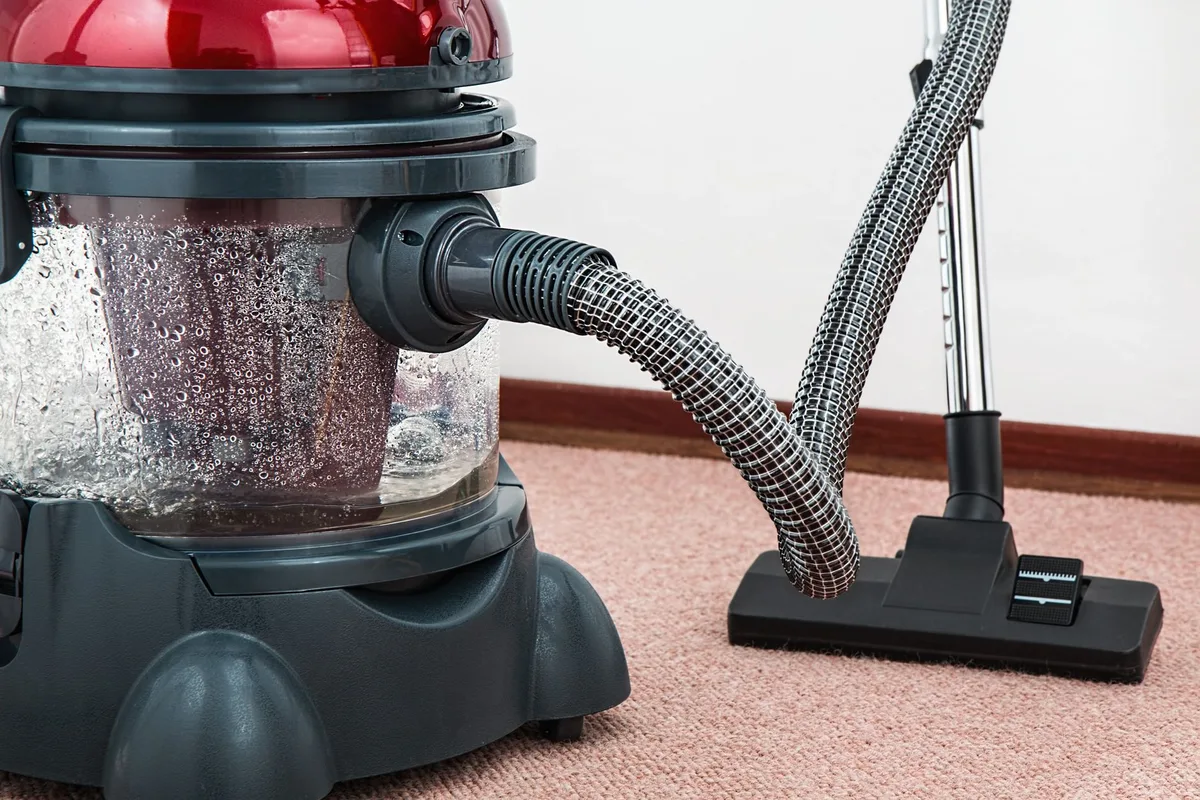
A wet vacuum cleaner is an appliance designed to effectively remove both dry debris (like dust and dirt) and liquids (like water, spills, or pet messes) from surfaces. Its key difference lies in its internal design, which protects the motor from water damage and safely contains liquids, making it a versatile tool for significant spills and general cleanup.
Core Explanation: How a Wet Vacuum Actually Works
At its heart, a wet vacuum operates on the same principle as a dry vacuum: creating suction to pull debris into a collection area. However, the engineering for handling liquids is where the divergence occurs. The internal components are shielded to prevent water from reaching the motor, and a specialized tank system safely stores the collected liquids.
Motor Protection and Tank Design
The critical distinction in a wet vacuum lies in how it separates the motor from the liquid. Unlike a standard vacuum where the dirt bag or bin sits directly in the airflow path, wet vacuums typically feature a collection tank positioned below or around the motor’s intake. This tank is sealed and built from waterproof materials, capable of holding significant volumes of liquid. Manufacturer specifications often highlight the raised motor placement and a float mechanism designed to shut off suction when the tank reaches capacity, preventing overflow and protecting the motor.
Filtration for Wet and Dry Jobs
Filtration is another key differentiator. Standard vacuums use paper or cloth filters that can become saturated and ruined by liquids, leading to mold and poor performance. Wet vacuums may allow you to remove the filter entirely when vacuuming liquids; they are designed to operate without a filter in this mode. For dry vacuuming, some models use washable foam filters or specialized cartridge filters designed for both wet and dry use.
This adaptability ensures efficient pickup whether you're dealing with dust bunnies or a puddle.
Wet Vacuums vs. Standard Vacuums: What's the Real Difference?
The fundamental difference boils down to purpose and safety. A standard vacuum cleaner is built to handle solids only. Its motor and filtration system are optimized for dry dust, dirt, and debris. Introducing liquids can cause irreparable damage, from corroding motor parts to creating a breeding ground for mold within the filter and housing.
A wet vacuum, often referred to as a wet/dry vacuum or shop vac, is engineered for versatility. Its collection system is designed to safely contain liquids, and its motor is shielded against moisture. This means you can use it for everyday dry cleanup tasks and for emergency liquid extraction without risking appliance failure. Where a standard vacuum stops at dry messes, a wet vacuum tackles both.
Key Features That Make a Wet Vacuum Shine
The versatility of a wet vacuum comes from a few smart design choices. These features allow it to tackle messes that would be impossible for a basic vacuum.
Essential Components: What's Inside?
- Collection Tank: This is the primary reservoir for both dry debris and liquids. It’s usually made of durable plastic and is designed to be emptied easily. Many models have a maximum fill line.
- Motor Housing: Located typically above the collection tank to stay dry, this houses the motor that generates suction. It’s sealed and often features vents for cooling.
- Float Mechanism: A crucial safety feature, this device rises with the liquid level in the tank. When it reaches a certain height, it activates a shut-off mechanism that cuts off suction, alerting you that the tank needs to be emptied before overflow occurs.
- Intake Port: This is where the hose connects to suck up debris and liquids from the floor or surface.
- Power Switch: Typically a robust, often water-resistant toggle or button to turn the unit on and off. Some models also have a blower port.
- Hose and Wands: Similar to dry vacuums, these help you reach different areas. Specialized attachments are often available for different cleaning tasks.
- Wheels and Handle: For easier maneuverability, especially on larger shop vac models.
When You Absolutely Need a Wet Vacuum
You might think of a wet vacuum as a niche tool, but its utility extends to many common household and DIY scenarios. Having one on hand can turn a potentially disastrous cleanup into a manageable task.
Common Use Cases: Spills, Floods, and DIY
Tackling Household Spills Head-On
This is perhaps the most frequent reason people invest in a wet vacuum.
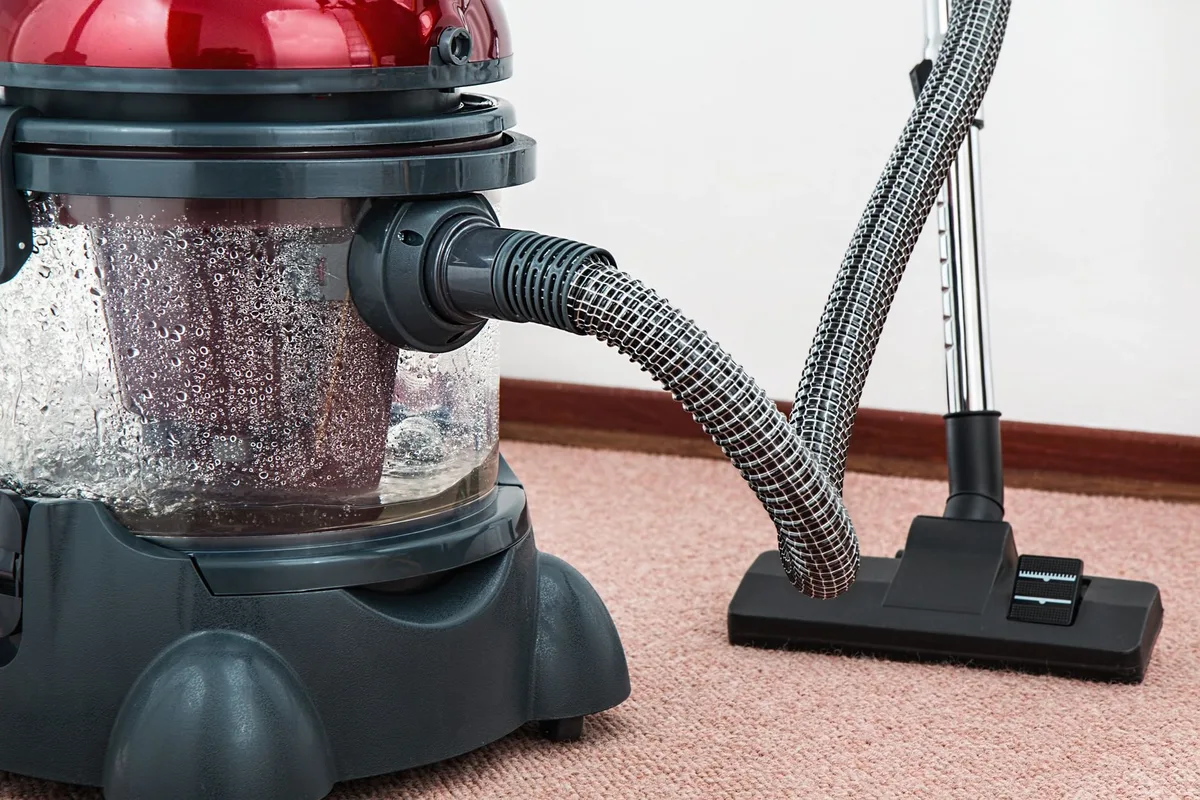
- Accidental spills of drinks, sauces, or pet accidents on carpet, upholstery, or hard floors. A wet vacuum can extract the liquid quickly, minimizing staining and odor development.
- Water from overflowing sinks, bathtubs, or toilets during a minor overflow.
- Leaky appliances like washing machines or dishwashers.
DIY Project Cleanup
When you're working on home improvement projects, dust and debris are inevitable. A wet vacuum can be a powerful ally for cleaning up afterward.
- Sawdust from cutting wood, drywall, or tile.
- Water used for wet-cutting tile or concrete.
- Removing sludge or debris from small excavation or patching jobs.
Dealing with Water Damage
For minor water incursions, a wet vacuum is invaluable for efficient water removal.
- Soaking up water after a heavy rainstorm enters a basement or garage.
- Extracting water from burst pipes or minor plumbing leaks.
- Clearing out flooded areas around sump pump failures.
Car Interior Deep Cleans
Car mats and carpets can trap a lot of dirt and moisture. A wet vacuum excels at deep cleaning automotive interiors.
- Removing spills, mud, and grime from car mats and floor liners.
- Drying out damp carpet after an interior leak or spill.
Who Benefits Most?
- Pet Owners: For frequent accidents on carpets or upholstery.
- DIY Enthusiasts: For managing debris from construction and repair projects.
- Homeowners in Flood-Prone Areas: For quick response to minor water damage.
- Anyone prone to spills: It's a practical tool for proactive mess management.
Potential Pitfalls: Mistakes to Watch Out For
While incredibly useful, there are a few common mistakes people make with wet vacuums that can lead to frustration or damage.
- Using a Standard Vacuum for Liquids: This is the most critical mistake. It can lead to electrical shock hazards, motor burnout, and permanent damage to the vacuum. Manufacturer safety guides strongly advise against this.
- Overfilling the Tank: Ignoring the float mechanism or fill line can cause liquid to be sucked into the motor housing, even with protection systems in place. Always empty the tank when it's near capacity.
- Using the Wrong Filter: For dry use, a standard filter is fine. However, when vacuuming liquids, using a saturated dry filter can reduce suction power and potentially damage the filter itself. If vacuuming liquids, ensure the filter is removed or a foam sleeve is used as per the manufacturer’s instructions.
- Not Cleaning After Use: If you vacuum up liquids and then leave the machine for extended periods without cleaning the tank and hose, you risk mold and odor buildup. Proper maintenance is key for longevity and hygiene.
- Electric Shock Hazard: Always ensure the vacuum is unplugged before opening the motor housing, emptying the tank, or performing maintenance. Water and electricity are a dangerous combination.
Benefits and Drawbacks: Is It Right for You?
Deciding if a wet vacuum fits your needs involves weighing its advantages against potential downsides and comparing it to alternatives.
The Advantages of Having One
- Versatility: Handles both wet and dry messes, making it a true all-in-one cleanup tool for many common household emergencies.
- Powerful Suction: Many models, especially shop vacs, offer significant suction power, adept at picking up larger debris and significant liquid volumes.
- Prevents Damage: Efficiently removes liquids, preventing them from soaking into carpets, subfloors, or damaging furniture and electronics.
- Faster Cleanup: Can extract liquids much faster than towels or mops, significantly reducing drying time and potential for mold growth.
- Cost-Effective for Emergencies: Instead of calling for professional cleanup for minor spills or floods, a wet vacuum can be a DIY solution.
- Multi-Purpose: Can often be used as a blower, making it useful for clearing leaves or dust from hard-to-reach areas.
When It Might Not Be the Best Fit
- Frequency of Use: If you rarely deal with significant spills and your cleaning needs are primarily dry dust and debris, a standard vacuum might be sufficient and more convenient for regular use.
- Storage Space: Larger wet/dry vacs, particularly shop vacs, can be bulky and require dedicated storage space.
- Carpet Cleaning Specialty: For deep, professional-level carpet cleaning or stain removal, a dedicated carpet extractor machine designed for deep shampooing and extraction is generally more effective than a standard wet vacuum.
- Weight and Maneuverability: Larger models can be heavy, especially when the tank is full of liquid, making them less ideal for easy movement around multi-story homes for some users.
Step-by-Step: Using Your Wet Vacuum
Operating a wet vacuum is straightforward, but following these steps ensures safe and effective use.
Getting Started: Setup and Preparation
- Read the Manual: Always consult your specific model's user manual. Manufacturer instructions are paramount for safe operation and warranty compliance.
- Check the Filter: If you're vacuuming liquids, ensure the required filter (often a foam sleeve or no filter at all) is in place and any dry filters are removed or protected. For dry debris, use the appropriate dry filter.
- Attach the Hose: Connect the suction hose securely to the intake port. For most wet pickups, this is on the main body of the vacuum.
- Connect Power: Plug the vacuum into a suitable, grounded electrical outlet. Ensure the area is dry where you are plugging it in.
Operating the Machine for Wet Messes
- Position the Vacuum: Place the vacuum as close to the liquid mess as possible to maximize efficiency.
- Turn On Suction: Switch the vacuum on. You should feel strong suction through the hose.
- Guide the Hose: Move the hose over the liquid, drawing it into the collection tank. For larger spills, you may need to work in sections.
- Listen for the Float: Pay attention to the sound of the motor. As the tank fills, the pitch may change, and the float mechanism will eventually engage, significantly reducing or cutting off suction when the tank is full.
Cleaning Up After Use
- Turn Off and Unplug: Switch the vacuum off and unplug it from the power source.
- Empty the Tank: Carefully remove the tank or tilt the vacuum to drain the collected liquid into a suitable drain or container. Be prepared for the weight if it’s full.
- Rinse and Dry: Rinse the tank with clean water to remove any residue. Wipe down the exterior and interior of the tank, hose, and any attachments. Allow all components to air dry completely before reassembling or storing to prevent mold and odors.
- Check the Filter: If a filter was used, clean or replace it as recommended by the manufacturer.
Maintenance: Keeping Your Wet Vacuum Ready
Proper maintenance ensures your wet vacuum performs reliably and lasts for years. Aggregate user reviews and manufacturer guidelines consistently stress the importance of post-use cleaning.
- Regularly Empty and Clean the Tank: After each use, particularly when dealing with liquids, empty the tank fully and rinse it out. Use mild soap and water if necessary, but ensure it's thoroughly dried afterward.
- Inspect the Filter(s): For dry filtering, check for clogs, tears, or excessive dirt. Washable filters should be cleaned according to instructions. Disposable filters need regular replacement. For wet use, ensure the correct filter (or no filter) is used and that it’s clean and dry before switching back to dry mode.
- Check the Float Mechanism: Periodically inspect the float mechanism to ensure it moves freely and isn't obstructed by debris. This is crucial for preventing overfilling.
- Inspect Hoses and Cords: Look for any cracks, tears, or damage to the power cord, hose, and any attachments. Replace damaged parts immediately for safety.
- Store Properly: Keep the vacuum in a clean, dry place. Storing it with the tank lid slightly ajar can help air circulate and prevent residual moisture from causing issues.
Benefits and Drawbacks: Is It Right for You?
Deciding if a wet vacuum fits your needs involves weighing its advantages against potential downsides and comparing it to alternatives.
The Advantages of Having One
- Versatility: Handles both wet and dry messes, making it a true all-in-one cleanup tool for many common household emergencies.
- Powerful Suction: Many models, especially shop vacs, offer significant suction power, adept at picking up larger debris and significant liquid volumes.
- Prevents Damage: Efficiently removes liquids, preventing them from soaking into carpets, subfloors, or damaging furniture and electronics.
- Faster Cleanup: Can extract liquids much faster than towels or mops, significantly reducing drying time and potential for mold growth.
- Cost-Effective for Emergencies: Instead of calling for professional cleanup for minor spills or floods, a wet vacuum can be a DIY solution.
- Multi-Purpose: Can often be used as a blower, making it useful for clearing leaves or dust from hard-to-reach areas.
When It Might Not Be the Best Fit
- Frequency of Use: If you rarely deal with significant spills and your cleaning needs are primarily dry dust and debris, a standard vacuum might be sufficient and more convenient for regular use.
- Storage Space: Larger wet/dry vacs, particularly shop vacs, can be bulky and require dedicated storage space.
- Carpet Cleaning Specialty: For deep, professional-level carpet cleaning or stain removal, a dedicated carpet extractor machine designed for deep shampooing and extraction is generally more effective than a standard wet vacuum.
- Weight and Maneuverability: Larger models can be heavy, especially when the tank is full of liquid, making them less ideal for easy movement around multi-story homes for some users.
Step-by-Step: Using Your Wet Vacuum
Operating a wet vacuum is straightforward, but following these steps ensures safe and effective use.
Getting Started: Setup and Preparation
- Read the Manual: Always consult your specific model's user manual. Manufacturer instructions are paramount for safe operation and warranty compliance.
- Check the Filter: If you're vacuuming liquids, ensure the required filter (often a foam sleeve or no filter at all) is in place and any dry filters are removed or protected. For dry debris, use the appropriate dry filter.
- Attach the Hose: Connect the suction hose securely to the intake port. For most wet pickups, this is on the main body of the vacuum.
- Connect Power: Plug the vacuum into a suitable, grounded electrical outlet. Ensure the area is dry where you are plugging it in.
Operating the Machine for Wet Messes
- Position the Vacuum: Place the vacuum as close to the liquid mess as possible to maximize efficiency.
- Turn On Suction: Switch the vacuum on. You should feel strong suction through the hose.
- Guide the Hose: Move the hose over the liquid, drawing it into the collection tank. For larger spills, you may need to work in sections.
- Listen for the Float: Pay attention to the sound of the motor. As the tank fills, the pitch may change, and the float mechanism will eventually engage, significantly reducing or cutting off suction when the tank is full.
Cleaning Up After Use
- Turn Off and Unplug: Switch the vacuum off and unplug it from the power source.
- Empty the Tank: Carefully remove the tank or tilt the vacuum to drain the collected liquid into a suitable drain or container. Be prepared for the weight if it’s full.
- Rinse and Dry: Rinse the tank with clean water to remove any residue. Wipe down the exterior and interior of the tank, hose, and any attachments. Allow all components to air dry completely before reassembling or storing to prevent mold and odors.
- Check the Filter: If a filter was used, clean or replace it as recommended by the manufacturer.
Maintenance: Keeping Your Wet Vacuum Ready
Proper maintenance ensures your wet vacuum performs reliably and lasts for years. Aggregate user reviews and manufacturer guidelines consistently stress the importance of post-use cleaning.
- Regularly Empty and Clean the Tank: After each use, particularly when dealing with liquids, empty the tank fully and rinse it out. Use mild soap and water if necessary, but ensure it's thoroughly dried afterward.
- Inspect the Filter(s): For dry filtering, check for clogs, tears, or excessive dirt. Washable filters should be cleaned according to instructions. Disposable filters need regular replacement. For wet use, ensure the correct filter (or no filter) is used and that it’s clean and dry before switching back to dry mode.
- Check the Float Mechanism: Periodically inspect the float mechanism to ensure it moves freely and isn't obstructed by debris. This is crucial for preventing overfilling.
- Inspect Hoses and Cords: Look for any cracks, tears, or damage to the power cord, hose, and any attachments. Replace damaged parts immediately for safety.
- Store Properly: Keep the vacuum in a clean, dry place. Storing it with the tank lid slightly ajar can help air circulate and prevent residual moisture from causing issues.
Costs / Pricing / Data / Specs
When looking at wet vacuum cleaners, the price can vary quite a bit depending on the brand, capacity, and features. You can find basic, handheld wet vacs starting around $30 to $60. These are great for small spills and quick pickups.
For more powerful shop vac style units, expect to spend between $70 and $200. These models usually have larger tanks (10 to 16 gallons or more), stronger motors, and more specialized attachments. High-end professional-grade wet/dry vacuums can go for $250 and up, offering enhanced durability, larger capacities, and specialized filtration systems. For example, some industrial units designed for construction sites might boast 1600-watt motors and 20-gallon tanks, with prices reflecting their robust build and performance.
Expert Tips / Pro Advice
To get the most out of your wet vacuum, consider these practical tips from industry professionals who rely on these machines regularly.
- Have the Right Attachments: Beyond the standard floor nozzle, consider investing in crevice tools for tight spots, a brush tool for upholstery, and perhaps a specialized wet floor nozzle for hard surfaces. These attachments make a big difference.
- Pre-Treat Stains: For deep-set liquid stains or pet messes, pre-treating the area with an appropriate cleaning solution can boost the wet vacuum's effectiveness. Let the solution work for a few minutes before vacuuming.
- Use Blower Function Wisely: If your unit has a blower port, it can be incredibly useful for drying carpets faster after wet vacuuming or for clearing debris from workshops. Just be mindful of where the blown air is going.
- Regularly Check for Obstructions: Small debris can sometimes clog the hose or intake port. A quick check before and after use can save you a lot of frustration.
Safety / Legal / Compliance / Warnings
Operating any electrical appliance around liquids requires caution. Always prioritize safety by following these guidelines, which are often reinforced in manufacturer warnings.
- NEVER Use Near Exposed Electrical Outlets or Water Sources: Do not operate the vacuum if exposed electrical outlets are nearby or if the area is excessively wet. This is a critical safety measure to prevent electrocution.
- Unplug Before Maintenance: Always disconnect the power cord from the wall outlet before emptying the tank, cleaning components, or performing any kind of maintenance.
- Check for Damage: Before each use, inspect the power cord, plug, hose, and tank for any signs of damage, such as cracks or fraying. Do not use if any part appears compromised.
- Use GFCI Outlets: Whenever possible, plug your wet vacuum into a Ground Fault Circuit Interrupter (GFCI) protected outlet. These outlets are designed to shut off power rapidly if they detect an imbalance in the current, reducing shock risk.
- Float Switch Functionality: Ensure the float mechanism is working correctly. If it fails, the tank can overfill, leading to potential motor damage or a safety hazard.
Real Scenarios / Case Examples
Let's look at a couple of everyday situations where a wet vacuum proves its worth, illustrating its practical application beyond just simple spills.
Scenario 1: The Burst Washing Machine Hose
Imagine a washing machine hose bursts overnight in your laundry room. By morning, there’s about an inch of standing water across the floor, possibly seeping under cabinets.
- Problem: Rapid water spread, potential subfloor damage, mold risk.
- Solution: Using a shop vac with its tank for liquid pickup, you can extract the bulk of the water quickly. For a 10-gallon tank, this might take several emptying cycles depending on the water volume, but it’s far faster than manual methods.
- Outcome: Significant water removed within an hour, minimizing saturation time for materials. This helps prevent long-term mold growth and structural damage.
Scenario 2: The Overenthusiastic Pet
Your dog, excited after a walk, brings mud and water all over your living room carpet.
- Problem: Muddy paw prints, soaked carpet fibers, potential odor.
- Solution: After removing loose debris, use the wet vacuum with a suitable carpet attachment. Work systematically, drawing the moisture and dirt from the carpet fibers. Follow up with a carpet cleaner or appropriate cleaning solution.
- Outcome: The carpet is left damp rather than soaked, and much of the mud is extracted. This speeds up drying time and makes subsequent cleaning much more effective, reducing the chance of lingering odors.
Final Recommendation / Verdict / Decision Guide
So, do you need a wet vacuum cleaner? The answer really depends on your lifestyle and home. If your home is prone to spills, you have pets, you enjoy DIY projects, or you live in an area where minor water damage is a concern, then a wet vacuum is an incredibly valuable tool. It’s not a replacement for your everyday vacuum, but rather a specialized assistant for those messier, more challenging cleanups.
Think about these points:
- Frequency of Spills: If spills are common, a wet vacuum saves time and prevents damage.
- DIY Activity: Involved in projects that create dust or require water cleanup? It's a must-have.
- Storage: Can you spare the space for a unit that might be larger than a standard vacuum?
- Type of Messes: Are you dealing with simple dry messes, or do liquids present a frequent challenge?
For most households, a mid-sized wet/dry vacuum (around 5-10 gallons) offers a good balance of capacity, power, and portability. They are robust enough for most household emergencies and DIY tasks, while not being overly cumbersome to store. If you anticipate tackling significant water damage or professional-level cleaning, you might consider larger capacity models or specialized carpet extractors.