How To Make Window Cleaner At Home: Easy DIY Guide
Mix white vinegar, water, and a few drops of dish soap in a spray bottle for streak-free windows. It works because vinegar cuts through grime while soap helps the solution spread evenly without leaving residue.
There's something oddly satisfying about looking through a perfectly clean window, like the world outside just got a little brighter. I've been making my own window cleaner for years now, and honestly, I can't go back to store-bought stuff. It started as a way to save money, but over time I realized it's also better for my health, my home, and the planet. Most commercial glass cleaners are loaded with harsh chemicals that leave behind fumes and residue. The good news is, you probably already have everything you need in your kitchen to make a window cleaner at home that works just as well, if not better.
I've tested dozens of combinations over the years, from simple vinegar solutions to more complex mixes with essential oils. Some worked great, others left streaks that drove me crazy. Through all that trial and error, I've figured out what actually delivers that crystal-clear shine without the chemical smell or the hefty price tag. In this guide, I'll walk you through everything you need to know, from the basic recipe to pro tips that make the whole process easier.
Why Make Your Own Window Cleaner
If you've ever stood in the cleaning aisle staring at rows of blue and green bottles, you're not alone. The truth is, most of those products contain ingredients you probably don't want to breathe in or leave on surfaces your family touches every day. Making window cleaner at home puts you in control of what goes into the bottle.
There are also practical reasons that go beyond health. Homemade solutions cost pennies per batch compared to buying commercial cleaners month after month. You reduce plastic waste by reusing the same spray bottle over and over. And honestly, there's a certain satisfaction that comes from mixing up your own solution and watching it work just as well as something you'd pay ten dollars for at the store.
I've also found that homemade cleaners are more forgiving. If you accidentally use too much of one ingredient, you can adjust on the fly. Try doing that with a pre-mixed commercial product and you're stuck with whatever's in the bottle.
Benefits of DIY Window Cleaner
When you switch to homemade window cleaner, you're getting a solution that's simple, effective, and customizable. Here are the main benefits I've experienced firsthand:
- It's budget-friendly and uses ingredients you likely already have at home
- You avoid harsh chemicals like ammonia and artificial fragrances
- It's safer around kids and pets since you control every ingredient
- You can tweak the recipe to suit your water type and cleaning needs
- It reduces single-use plastic from constantly buying new bottles
Common Concerns About Homemade Cleaners
I get it, some people worry that DIY solutions won't work as well as name-brand products. That concern is understandable, especially if you've been burned by homemade recipes that left streaks or didn't actually clean. The key is using the right ratios and the right ingredients.
Vinegar is acidic, which is what makes it so effective at cutting through grease and grime on glass. Dish soap adds a bit of surfactant power, helping the solution cling to the surface and lift dirt. When you combine them properly with water, you get a cleaner that rivals anything on the shelf.
The only real downside is that vinegar has a smell during application, but it dissipates quickly. If you add a few drops of essential oil, you barely notice it at all.
Essential Ingredients for Homemade Window Cleaner
The beauty of making window cleaner at home is that the ingredient list is short and sweet. You don't need specialty products or hard-to-find supplies. Just a few basics from your pantry and you're good to go.
I've kept the same ingredient list for years and it hasn't let me down yet. Everything serves a purpose, and each one plays a role in getting that streak-free shine we're all after.
White Vinegar
White vinegar is the star of the show. Its acetic acid content is what breaks down mineral deposits, grease, and grime that build up on glass over time. I use standard white vinegar with 5% acidity, which is what you typically find in grocery stores.
If you're dealing with hard water spots or really stubborn buildup, vinegar is your best friend. I've used it on everything from kitchen windows to glass shower doors, and it never disappoints.
Water
Water dilutes the vinegar and helps the solution spread evenly across the glass. I use plain tap water most of the time, but if you live in an area with very hard water, you might want to use distilled water instead. Hard water can leave mineral deposits that actually create streaks.
I learned this the hard way when I moved to an area with well water. My windows looked worse after cleaning than before. Switching to filtered water fixed the problem instantly.
Dish Soap
A few drops of dish soap make a big difference. It acts as a surfactant, which means it helps the solution cling to the glass and break down oily residue. Without it, the vinegar solution can run off too quickly and not get a chance to work.
I use a basic, unscented dish soap because I don't want extra fragrance competing with the vinegar smell. Just a tiny drop or two is plenty. Too much soap will actually cause more streaks.
Rubbing Alcohol (Optional)
Adding a small amount of rubbing alcohol helps the solution dry faster, which is great if you're cleaning windows on a hot day. It also helps prevent streaking by evaporating quickly.
I usually skip this in the winter when humidity is lower and the solution dries fine on its own. But during humid summer months, that little bit of alcohol makes a noticeable difference.
Essential Oils (Optional)
If the vinegar smell bothers you, a few drops of lemon or lavender essential oil can help mask it. Lemon oil also has natural degreasing properties, which is a nice bonus.
I started adding lemon oil after my partner complained about the vinegar smell one too many times. Now it's become my default because the windows smell fresh, not chemical-y.
Basic DIY Window Cleaner Recipe
This is the recipe I come back to again and again. It's simple, effective, and uses ingredients I always have on hand. If you're new to making homemade window cleaner, start with this version before experimenting with variations.
What You Need
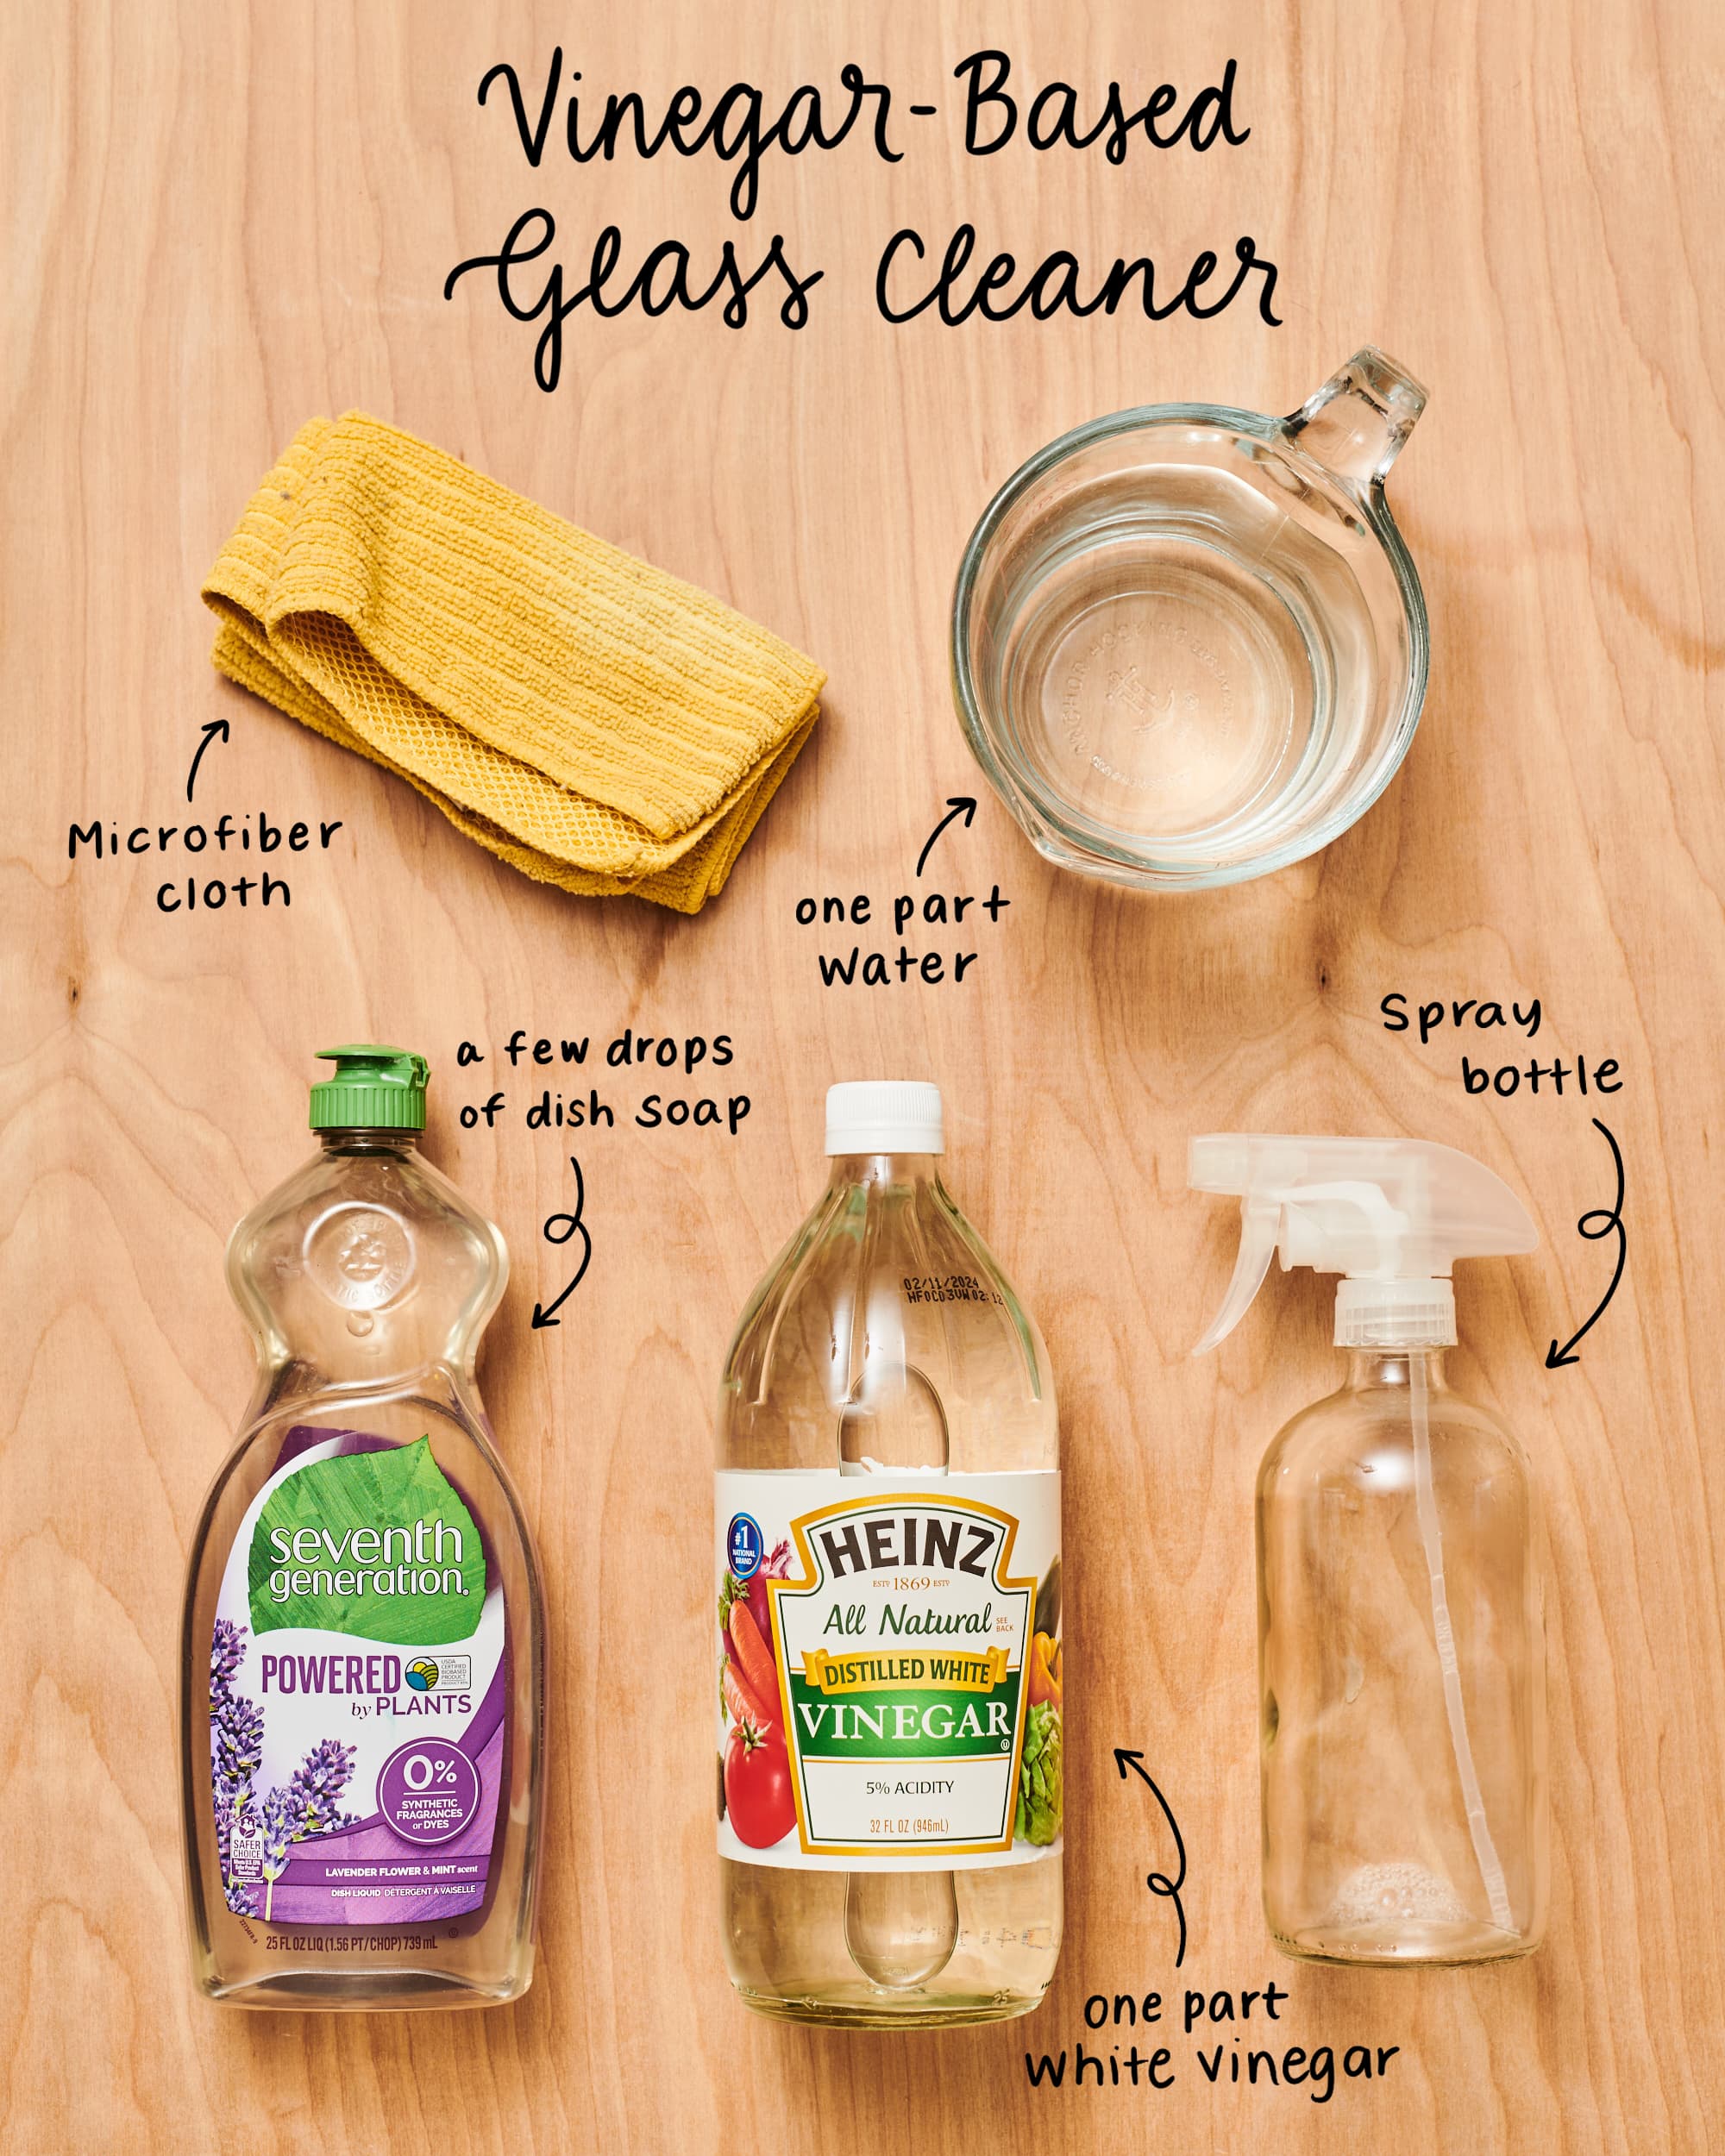
- 2 cups white vinegar
- 2 cups water
- 1 to 2 drops dish soap
- A clean spray bottle
Step by Step Instructions
- Pour the white vinegar into your spray bottle using a funnel to avoid spills
- Add the water to the spray bottle
- Add 1 to 2 drops of dish soap to the mixture
- Gently swirl the bottle to combine everything without creating too many bubbles
- Screw the spray top on tightly and give it one more gentle shake
- Your window cleaner is ready to use right away
I usually make a big batch by tripling the recipe and storing it in a larger container, then refilling my spray bottle as needed. The solution stays good for months, so you don't have to worry about it going bad.
One tip, don't shake the bottle aggressively. You want to mix the ingredients without creating foam. Foam means bubbles, and bubbles mean streaks when they dry on the glass.
Variations and Custom Recipes
Once you've mastered the basic recipe, it's fun to experiment with different variations. Different situations call for different solutions, and tweaking the formula can help you tackle specific challenges.
I keep two or three different bottles on hand depending on what I'm cleaning. The basic version handles most jobs, but sometimes I need something with a little extra power.
Heavy-Duty Window Cleaner for Tough Grime
For windows that haven't been cleaned in a while or have built-up residue, I bump up the vinegar concentration and add rubbing alcohol for extra cleaning power.
Mix 1 cup white vinegar, 1 cup water, and 1/4 cup rubbing alcohol in your spray bottle. Skip the dish soap for this version since the higher vinegar content does the heavy lifting.
This is my go-to for spring cleaning when I'm tackling windows that have been neglected all winter. It cuts through grime that regular cleaners struggle with.
Streak-Free Window Cleaner for Shiny Glass
If you want to take it up a notch, this version is what I use when I really want that professional, streak-free finish. The trick is using distilled water and adding a small amount of cornstarch.
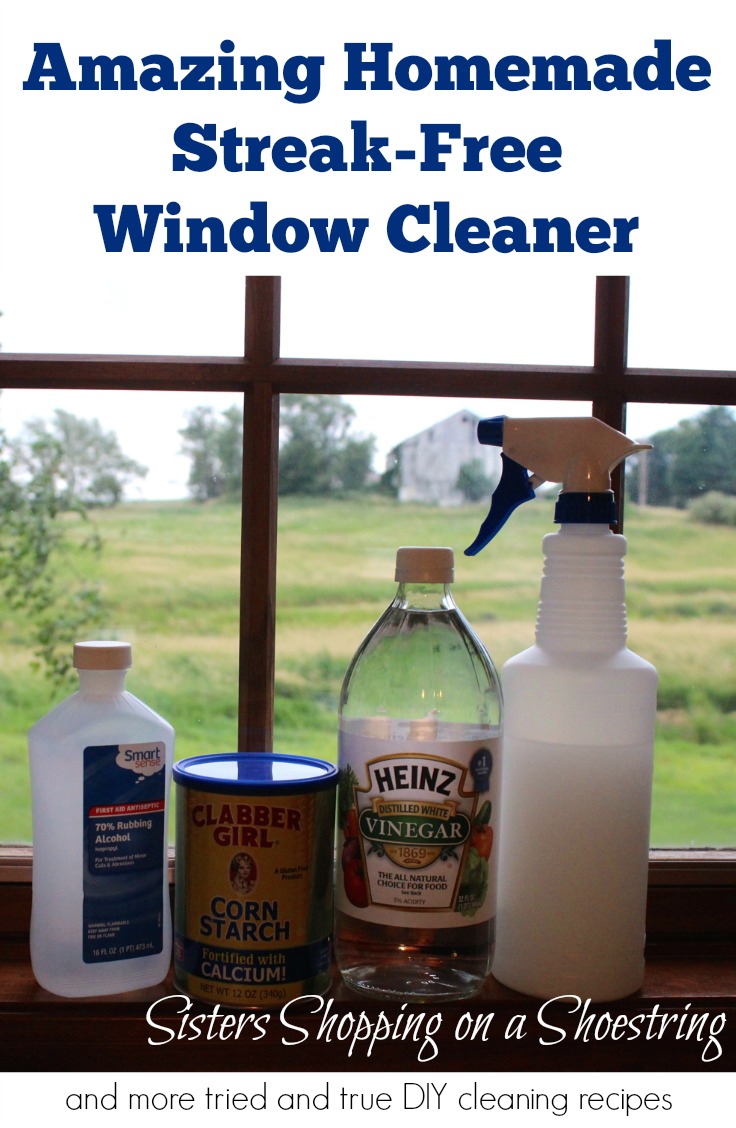
Combine 1/4 cup white vinegar, 2 cups distilled water, 1/4 cup rubbing alcohol, 1 tablespoon cornstarch, and 1 drop dish soap. Shake well before each use because the cornstarch tends to settle.
This recipe is overkill for everyday cleaning, but when you want windows that look like they were just installed, this is the one to reach for.
Natural Window Cleaner with Essential Oils
For a more pleasant scent, try this version that incorporates essential oils. I use this recipe in my kitchen and living room where I spend the most time.
Mix 1 1/2 cups white vinegar, 1 1/2 cups water, 1/4 cup rubbing alcohol, 1 drop dish soap, and 10 drops lemon essential oil. The lemon oil leaves behind a fresh, clean scent that makes the whole room smell nice.
Just be careful with the amount of essential oil. More is not better here. Too much oil can actually leave a film on the glass.
Tools You Need for the Best Results
Having the right tools can make the difference between streaky windows and crystal-clear perfection. I've tried everything from paper towels to newspaper, and let me tell you, not all materials are created equal.
After years of trial and error, I've narrowed it down to a few essentials that consistently deliver great results.
Microfiber Cloths
Microfiber cloths are the gold standard for window cleaning. They absorb moisture without leaving lint behind, and they don't push dirt around the way paper towels do. I keep a stack of them in my cleaning caddy specifically for windows.
I use one cloth to wipe the solution on and a second, dry cloth to buff the glass dry. This two-cloth method is what most professional cleaners swear by, and now I understand why.
Squeegee
If you have a lot of windows or large glass surfaces, a squeegee is a game-changer. It pulls the cleaning solution off the glass in one smooth motion, leaving behind a streak-free finish.
I bought a basic squeegee from the hardware store for about ten dollars, and it has paid for itself many times over. It's especially useful for big picture windows and glass doors where using a cloth would take forever.
Spray Bottle
A good spray bottle makes application much easier. Look for one that produces a fine mist rather than a stream. A stream can cause the solution to run down the glass before you have a chance to wipe it.
I repurpose old glass cleaner bottles because they're designed perfectly for this purpose. Just make sure to rinse them thoroughly before refilling.
Step by Step Window Cleaning Process
Now that you have your solution and your tools, it's time to actually clean the windows. The technique matters just as much as the solution. I've refined my process over the years to get the best results with the least effort.
Here's exactly how I clean my windows from start to finish. Once you get the hang of it, the whole process becomes second nature.
Preparation
Start by removing any dust or loose dirt from the window with a dry microfiber cloth. This step is crucial because if you spray solution on dusty glass, you'll just turn the dust into muddy streaks.
I also like to lay a towel at the base of the window to catch any drips. It saves me from having to wipe up the floor or windowsill afterward.
Application
Hold the spray bottle about 6 to 8 inches from the glass and apply an even coat of your homemade window cleaner. You want enough to cover the surface without it running down and pooling at the bottom.
Don't be stingy with the solution. A dry wipe will cause streaks, so make sure the glass is well-saturated before you start wiping.
Wiping Technique
Using your first microfiber cloth, wipe the solution across the glass in a back-and-forth motion. I usually work from top to bottom to avoid dripping on areas I've already cleaned.
For really dirty windows, you might need to go over the surface twice. Don't worry, the solution is gentle enough that it won't damage the glass even with repeated wiping.
Buffing
Take your second, dry microfiber cloth and buff the glass in circular motions. This step removes any remaining moisture and gives you that final, polished shine.
If you see streaks, they're probably caused by too much solution left on the glass. Just buff a little harder in those spots and they should disappear.
Dealing with Corners and Edges
Corners and edges are where solution tends to pool and leave marks. I use a corner of my microfiber cloth to get into these tight spots and wipe away any excess liquid.
For window tracks and sills, I use an old toothbrush dipped in the cleaning solution to scrub out built-up grime. It's a simple trick that makes a big difference in the overall appearance.
Tips for Streak-Free Windows Every Time
Even with the right solution and tools, there are a few tricks that can take your window cleaning from good to great. These are the little details that professionals know but rarely share.
I've picked up these tips over years of cleaning, and now I can't imagine going back to my old, streaky ways.
Choose the Right Day
Weather matters more than most people think. Avoid cleaning windows in direct sunlight because the solution dries too quickly and leaves streaks. Cloudy days are actually perfect for window cleaning.
I also avoid cleaning when it's about to rain. There's nothing more frustrating than watching your hard work get washed away by a sudden downpour.
Use Less Soap Than You Think
This is a mistake I made for years. I thought more soap meant cleaner windows, but the opposite is true. Excess soap creates a film on the glass that attracts dirt and causes streaks.
One single drop of dish soap is plenty for an entire batch of cleaner. If you're seeing streaks, try using less soap before assuming the recipe is wrong.
Clean From Top to Bottom
Always work from the top of the window down. Gravity will pull the solution downward, and you don't want dirty liquid running over areas you've already cleaned.
This simple sequencing trick prevents you from re-dirtying clean glass and saves you time in the long run.
Change Your Cloths Often
Once a microfiber cloth gets saturated with dirty solution, it stops being effective. I keep a stack of clean cloths handy and switch them out as needed.
This is especially important if you're cleaning exterior windows, which tend to be much dirtier than interior ones.
Common Mistakes to Avoid
I've made just about every window cleaning mistake there is to make. Let me save you the trouble of learning the hard way by sharing the most common pitfalls and how to avoid them.
These are the errors that even experienced DIY cleaners make, often without realizing why their windows don't look as good as they should.
Using Too Much Product
More is not better when it comes to window cleaner. Excess solution takes longer to dry and creates more opportunities for streaks to form.
I use a light, even coat and resist the urge to douse the glass. A fine mist is all you need to get the job done right.
Cleaning in Direct Sunlight
I mentioned this earlier, but it bears repeating. Sunlight causes the solution to evaporate before you can wipe it properly, leaving behind streaks and water spots.
Wait for a cloudy day or clean windows in the early morning or late afternoon when the sun isn't directly hitting the glass.
Skipping the Dry Buff
The buffing step is what separates decent results from professional-looking results. Skipping it or using a damp cloth defeats the purpose.
Always use a clean, dry microfiber cloth for the final buff. This is the step that makes all the difference in how your windows look.
Using the Wrong Cloth
Paper towels and regular towels are not your friends when it comes to window cleaning. They leave behind lint and fibers that stick to wet glass.
Stick with microfiber cloths. They might cost a bit more upfront, but they're reusable, washable, and they actually do the job right.
Storing Your Homemade Window Cleaner
Proper storage ensures your DIY window cleaner stays effective and lasts as long as possible. The good news is, this solution is incredibly stable and doesn't require any special handling.
I keep a large batch in a gallon jug in my laundry room and refill my spray bottle as needed. This system has worked perfectly for years without any issues.
Shelf Life
Your homemade window cleaner will stay good for at least 6 months and probably much longer. Vinegar is a natural preservative, so the solution won't spoil or grow bacteria.
The only thing that might change is the smell. As the vinegar scent dissipates, the solution might smell more like water, but it's still perfectly effective.
Container Considerations
Use a glass or sturdy plastic container for long-term storage. Some essential oils can break down cheap plastic over time, so if you're adding oils, a glass bottle is a better choice.
Label your container clearly, especially if you have kids or housemates. While the solution is non-toxic, it's not something anyone should accidentally drink.
Temperature
You don't need to worry about refrigeration, but avoid storing your cleaner in extreme temperatures. Excessive heat can cause the bottle to expand and leak, while freezing can change the consistency.
A cool, dark place like a pantry or under the sink is perfect for storage.
Safety Considerations
One of the best things about homemade window cleaner is that it's much safer than commercial products. That said, there are still a few precautions worth keeping in mind.
I always remind friends who are new to DIY cleaning that natural doesn't automatically mean harmless. Vinegar is acidic, and it's worth treating it with a basic level of respect.
Ventilation
Even though vinegar is natural, the smell can be strong in enclosed spaces. Open a window or turn on a fan when cleaning, especially if you're sensitive to smells.
I usually just crack a window and the smell dissipates within a few minutes. It's nothing like the chemical fumes from commercial cleaners, but it's still good practice.
Skin Contact
Concentrated vinegar can irritate sensitive skin, especially if you have cuts or scrapes. I wear rubber gloves when I'm doing a big cleaning session, but for quick touch-ups, I usually skip them.
If you do get solution on your skin, just rinse with water. There's no need for special treatment.
Eye Protection
I'm guilty of skipping this one more often than I should, but it's worth wearing safety glasses if you're cleaning high windows or spraying overhead. The solution won't cause serious harm, but getting vinegar in your eyes is no fun.
A quick rinse with water is all you need if you do get splashed, but prevention is always easier.
Mixing with Other Cleaners
Never mix your homemade window cleaner with bleach or ammonia-based products. While this recipe doesn't contain those chemicals, it's a good general rule to follow.
Mixing cleaning products can create toxic fumes that are dangerous to breathe. Stick to one cleaner at a time and rinse surfaces thoroughly if you need to switch products.
Frequently Asked Questions
How long does homemade window cleaner last?
Homemade window cleaner typically lasts 6 months to a year when stored properly. The vinegar acts as a natural preservative, so the solution won't spoil. Just keep it in a sealed container away from extreme temperatures and it will stay effective.
Can I use apple cider vinegar instead of white vinegar?
White vinegar is recommended because it's clear and won't stain, but apple cider vinegar works in a pinch. The color might cause slight discoloration on very light surfaces, and the smell is stronger, so use it sparingly.
Is DIY window cleaner safe for tinted windows?
Yes, this recipe is safe for tinted windows. The ingredients are gentle and won't damage the tint film. Avoid ammonia-based cleaners on tinted glass, as they can cause the tint to peel over time.
Why are my windows streaky after cleaning?
Streaking is usually caused by using too much soap, cleaning in direct sunlight, or not buffing the glass dry. Try using less dish soap, cleaning on a cloudy day, and finishing with a clean, dry microfiber cloth.
Can I add essential oils to my window cleaner?
Yes, essential oils like lemon, lavender, or tea tree oil can be added for scent and extra cleaning power. Use just 5 to 10 drops per batch, as too much oil can leave a film on the glass.
Conclusion
Making window cleaner at home is one of those simple switches that makes a real difference in your daily life. You save money, reduce waste, and avoid harsh chemicals, all while getting windows that look just as clean as if you'd used a commercial product. The basic recipe of vinegar, water, and a drop of dish soap is all you really need to get started.
I've been making my own window cleaner for years now, and I can't imagine going back to store-bought versions. The process is quick, the ingredients are affordable, and the results speak for themselves. Once you try it, you'll wonder why you ever paid for something you can mix up in minutes with stuff you already have in your kitchen.
Give the basic recipe a try this weekend and see how it works for you. Play around with the variations until you find the combination that fits your needs best. Your windows will thank you, your wallet will thank you, and you'll feel good knowing exactly what's going into the products you use in your home. If you have questions or want to share your own DIY cleaning tips, drop a comment below. I love hearing what works for other people and learning new tricks along the way.