How To Do Dry Cleaning Clothes At Home: 2026 Guide
You can safely dry clean many clothes at home using a dry cleaning kit, a gentle hand-wash method, or a steamer, saving both time and money. Once you learn the right steps, caring for delicate fabrics like silk, wool, and cashmere becomes much less stressful, and you won't have to make a trip to the cleaner for every little stain.
I've been experimenting with at-home dry cleaning for years, and I can tell you honestly — it's one of those skills that feels intimidating at first but quickly becomes second nature. Most garments labeled "dry clean only" don't actually need harsh chemical treatments. With the right tools, a little patience, and a few insider tricks, you can get professional-looking results right from your laundry room. Let me walk you through everything I've learned so you can avoid the costly dry cleaner trips and keep your favorite pieces looking fresh.
:max_bytes(150000):strip_icc()/how-to-dry-clean-clothing-at-home-steaming-getty-0923-cb837c9cb6214fbaa79df09b905cab81.jpg)
What Is At-Home Dry Cleaning and How Does It Work
At-home dry cleaning is a method of cleaning delicate or "dry clean only" garments without using a traditional washing machine or water-based process. Instead, it relies on a dry cleaning solvent, a cleaning cloth, or gentle hand-washing techniques that mimic what a professional cleaner does — just on a smaller scale.
The process works in two main ways. The first uses a commercial dry cleaning kit, which includes a stain remover, a specialized cleaning cloth treated with a gentle solvent, and a reusable bag. You place your clothes in the bag with the cloth, pop it in the dryer on low heat, and the steam activates the cleaning agent. The second method involves hand-washing with a mild detergent designed for delicates, followed by careful air drying.
The key thing to understand is that "dry cleaning" doesn't literally mean the clothes are washed in a dry state — it means the cleaning process avoids water. Professional dry cleaners use a chemical solvent called perchloroethylene (perc), but home methods rely on much gentler alternatives. The goal is the same: remove dirt, oils, and odors while protecting delicate fibers.
This approach works best for garments made of silk, wool, cashmere, rayon, linen, and certain synthetics. It also works well for structured pieces like blazers, dresses with linings, and items with embellishments that could get damaged in a regular wash cycle.
Why Some Clothes Require Dry Cleaning
Not every piece in your wardrobe can handle a spin in the washing machine, and understanding why helps you decide when home dry cleaning makes sense.
The "dry clean only" label exists for a reason, and it usually comes down to one of these factors:
- Fabric sensitivity: Materials like silk, wool, and cashmere can shrink, lose shape, or become misshapen when exposed to water and agitation.
- Color bleeding: Some dyes aren't colorfast and will release color in water, ruining the garment.
- Structural integrity: Tailored items like suits, blazers, and lined dresses can lose their shape or cause interfacing to separate when machine washed.
- Embellishments: Beading, sequins, leather patches, and glued elements can melt, fall off, or deteriorate in a standard wash.
- Lining issues: Some garments have linings that shrink at a different rate than the outer fabric, causing puckering and distortion.
I learned this the hard way with a beautiful silk blouse I tossed in the wash on a busy morning. It came out looking like a wrinkled dishcloth, and the color had faded into uneven patches. That was the moment I committed to learning home dry cleaning properly.

Tools and Supplies You Need for Home Dry Cleaning
Before you start, gather everything you need. Having your supplies ready makes the process smoother and reduces the risk of damaging your clothes.
Here's what you'll need:
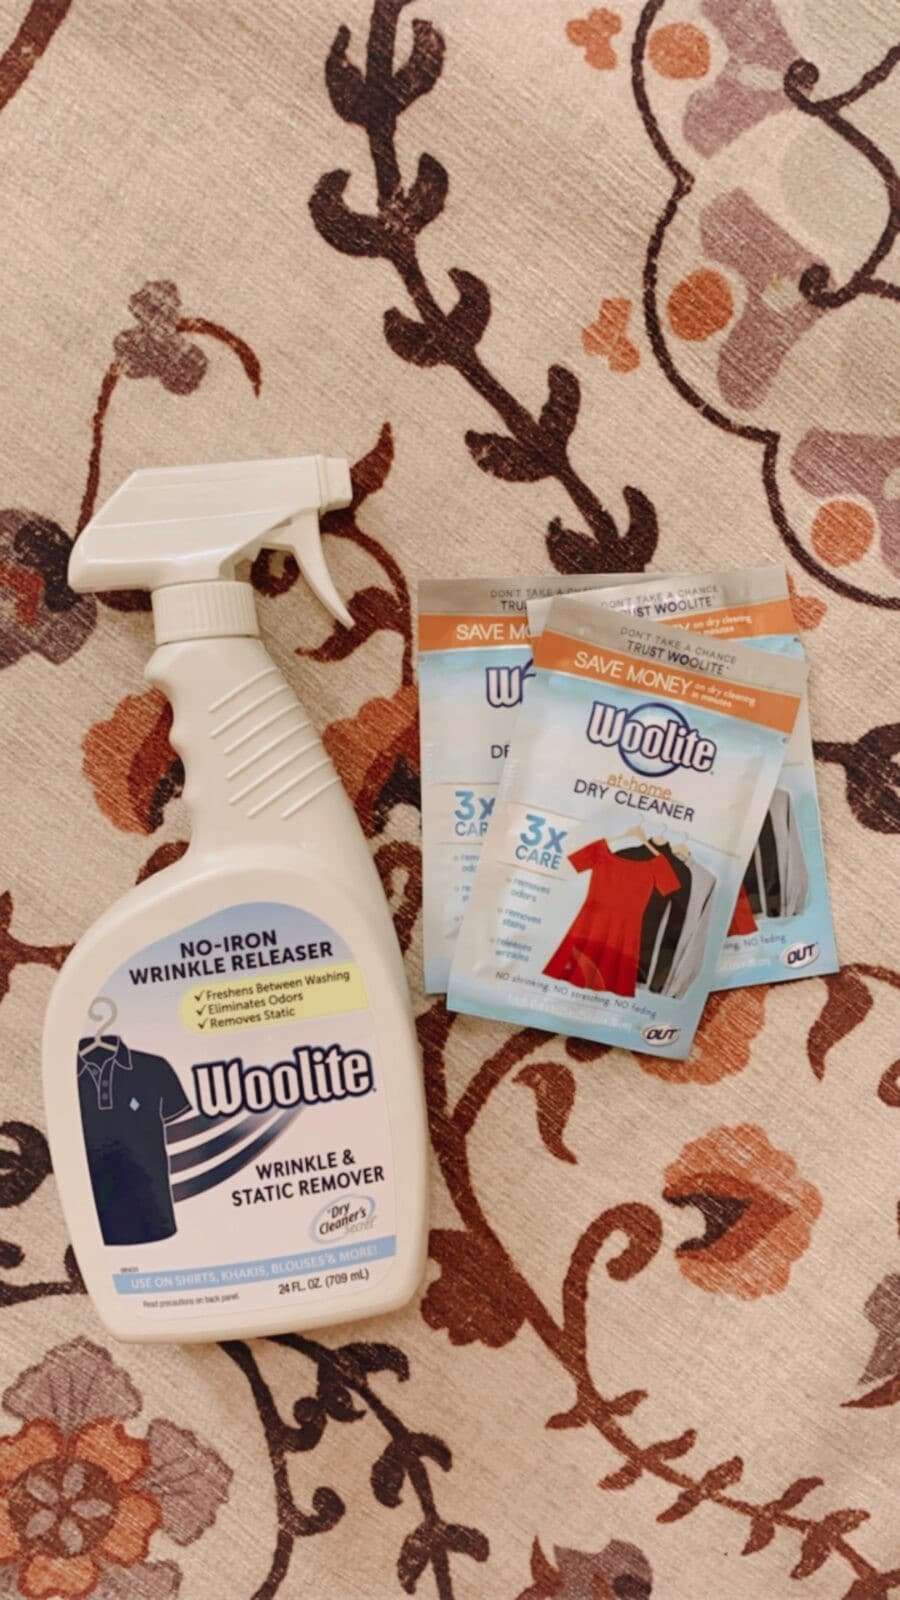
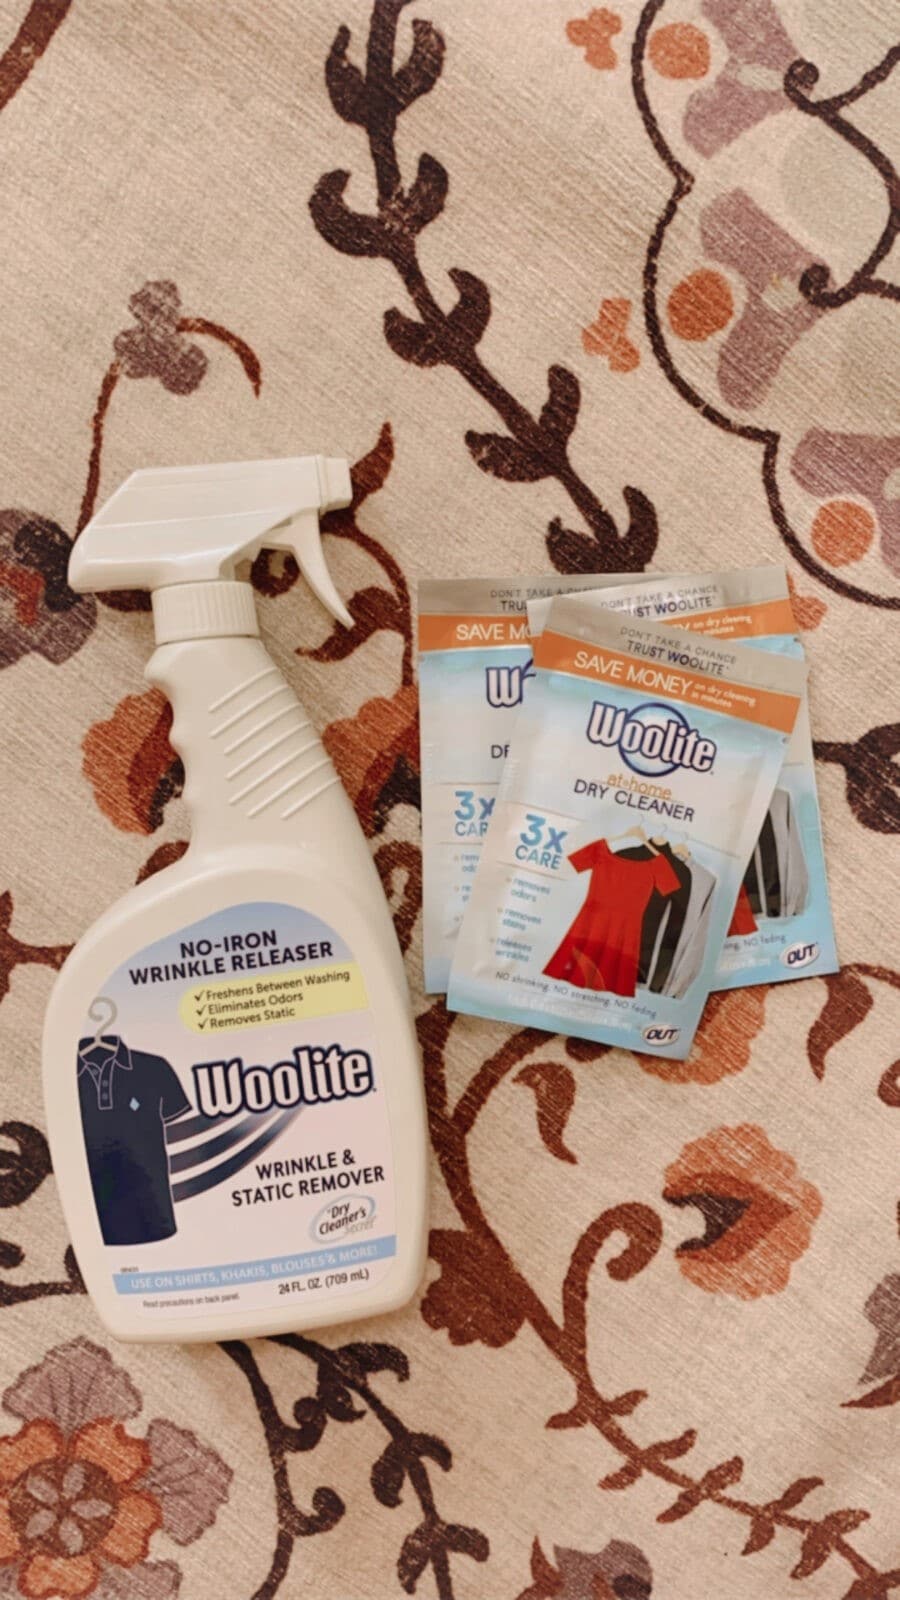
- A home dry cleaning kit: Brands like Dryel, Woolite, and at-home alternatives offer kits with cleaning cloths, stain removers, and reusable bags.
- A garment steamer: A handheld steamer is perfect for refreshing fabrics, removing wrinkles, and tackling light odors without full washing.
- Gentle detergent for delicates: Look for products labeled safe for silk and wool, such as Eucalan, Soak, or The Laundress.
- Clean white towels: These are essential for blotting moisture and supporting garments while drying.
- A mesh laundry bag: Useful for protecting items during any machine-based steps.
- Lint-free cloths: Microfiber cloths work great for applying spot treatments.
- A padded or shaped hanger: Helps maintain the structure of blazers, dresses, and suits while they dry.
- A spray bottle: For mixing DIY freshening solutions with water and a tiny bit of fabric-safe essential oil.
Optional but helpful supplies include a small sewing kit for quick repairs, a fabric shaver for removing pills, and a garment brush for lifting dust from wool coats and suits.

Step-by-Step Guide to Dry Cleaning Clothes at Home
Now let's get into the actual process. I'll walk you through three methods, starting with the easiest and moving to more hands-on options.
Method 1: Using a Home Dry Cleaning Kit
This is the closest thing to professional dry cleaning you can do without leaving your house, and it's the method I use most often for everyday pieces.
Follow these steps:
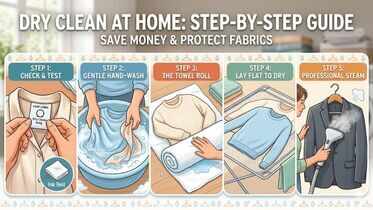
- Check the care label first. Make sure the garment is compatible with at-home dry cleaning kits. Most kits work on silk, wool, cashmere, rayon, and certain synthetics.
- Treat any visible stains. Use the stain remover that comes with your kit, or apply a small amount of gentle detergent directly to the spot. Let it sit for 10 to 15 minutes.
- Place the garment in the kit's cleaning bag. Add the treated cleaning cloth on top. The cloth is infused with a mild solvent that releases during the drying cycle.
- Put the bag in the dryer. Set it to medium or low heat and run it for 15 to 30 minutes, depending on the kit's instructions.
- Remove promptly and hang. Take the garment out as soon as the cycle ends to prevent new wrinkles from setting in.
The best part of this method is how little effort it requires. I often toss a few items in the bag on Sunday evening while I'm prepping for the week, and they come out fresh, soft, and ready to wear.
Method 2: Hand-Washing Delicate Fabrics
Some pieces deserve a more hands-on approach, especially if they have heavy stains or odors that a kit can't fully tackle.
Follow these steps:
- Fill a clean sink or basin with cool water. Hot water can cause shrinking and set stains, so always go cool.
- Add a small amount of delicate detergent. Swish the water with your hand to distribute the soap evenly.
- Submerge the garment and gently agitate it. Use slow, pressing motions rather than scrubbing. Let it soak for 10 to 15 minutes.
- Drain the soapy water and refill with clean cool water. Rinse the garment by pressing it gently — never wring or twist.
- Press out excess water between two clean towels. Lay the garment flat on a dry towel, roll it up, and gently press to absorb moisture.
- Reshape and lay flat to dry. Place the item on a drying rack or another clean towel, smoothing out any wrinkles and reshaping seams.
This method takes a little more time, but I've used it to rescue silk scarves and wool sweaters that looked hopeless after a coffee spill.
Method 3: Steaming and Freshening
Sometimes your clothes aren't dirty — they just need a refresh. Steaming is perfect for this situation.
Follow these steps:
- Hang the garment on a sturdy hanger. A door hook or shower rod works well.
- Fill your steamer with distilled water and let it heat up. Distilled water prevents mineral buildup in the machine.
- Hold the steamer a few inches from the fabric and move it slowly. Work from top to bottom, letting the steam relax the fibers.
- Pay extra attention to wrinkled areas. For stubborn creases, hold the steamer closer but never let it touch the fabric directly.
- Let the garment air out for 10 to 15 minutes before wearing or storing. This allows any remaining moisture to evaporate.
Steaming is my go-to for blazers and dresses between wears. It removes light odors, kills some bacteria, and makes the fabric look freshly pressed.

How to Remove Common Stains Without Damaging Fabric
Stains are inevitable, but how you handle them determines whether your clothes survive the encounter. Different stains require different approaches, and using the wrong method can set the stain permanently.
Here's a quick reference for tackling common stains on dry-clean-only fabrics:
- Oil-based stains (grease, makeup, salad dressing): Sprinkle a small amount of cornstarch or baby powder on the spot, let it absorb for 15 minutes, then brush it off gently. Follow up with a spot treatment from your dry cleaning kit.
- Water-based stains (wine, coffee, juice): Blot — never rub — with a clean white cloth dampened with cool water. Apply a tiny amount of delicate detergent and let it sit before washing.
- Sweat marks: Mix equal parts water and white vinegar in a spray bottle. Lightly mist the area and let it sit for 10 minutes before your chosen cleaning method.
- Ink stains: Place a clean cloth under the stain and dab with rubbing alcohol using a cotton ball. Work from the outside in to prevent spreading.
- Perfume or deodorant buildup: Gently rub the area with a microfiber cloth dampened with a little white vinegar, then air out the garment.
The biggest mistake I see people make is rubbing stains aggressively. It feels productive, but it actually pushes the stain deeper into the fibers and can damage the fabric surface. Always blot, dab, or press instead.

Mistakes to Avoid When Dry Cleaning at Home
Even with the best intentions, it's easy to make errors that ruin your clothes. Here are the most common pitfalls and how to sidestep them.
Skipping the care label is the number one mistake. Even if a fabric seems sturdy, the manufacturer knows best. If the label says "dry clean only," there's usually a reason, and ignoring it can lead to irreversible damage.
Using too much detergent is another frequent issue. More soap doesn't mean cleaner clothes — it means more residue trapped in the fibers. Always use less than you think you need.
Wringing delicate fabrics to remove water is a fast way to stretch and distort them. Always press water out gently between towels.
Drying in direct sunlight can fade colors and weaken fibers over time. Always dry garments flat or hang them in a shaded, well-ventilated area.
Ignoring the test spot is risky. Before applying any product to a visible area, test it on an inside seam or hidden corner. Some detergents and solvents can cause discoloration or texture changes.
Overloading the dryer bag reduces the effectiveness of the cleaning cloth. Stick to two or three items per cycle so the cloth can do its job properly.

How to Store Dry Cleaned Clothes Properly
Cleaning is only half the battle. How you store your clothes after dry cleaning determines how long they stay fresh and wrinkle-free.
Use breathable garment bags made of cotton or muslin rather than plastic. Plastic traps moisture and can cause yellowing or mildew. For long-term storage, wrap delicate items in acid-free tissue paper to prevent creasing and protect against fabric degradation.
Avoid overcrowding your closet. Cramming clothes together causes wrinkles and prevents air circulation, which can lead to musty odors. Give each piece a little breathing room.
Cedar blocks or lavender sachets work wonderfully for keeping moths away from wool and cashmere. Avoid mothballs if possible — the smell is harsh and the chemicals can transfer to fabric.
For seasonal items, store them in a cool, dry place with consistent temperature. Attics and basements often have humidity swings that damage delicate fibers.
Benefits and Limitations of At-Home Dry Cleaning
Like any method, home dry cleaning has its strengths and its drawbacks. Knowing both helps you decide when it makes sense and when you should still visit a professional.
The benefits are significant. You save money over time, especially if you have a wardrobe full of dry-clean-only pieces. It's more convenient because you can do it on your schedule without dropping off and picking up clothes. It's also gentler on your garments when done correctly, because professional cleaning sometimes uses harsher chemicals and more aggressive processes than necessary.
The limitations are real, though. Home methods can't handle heavy-duty stains like set-in grease or large ink spills. They also can't replace professional pressing and finishing for structured garments like suits and formal gowns. And some fabrics — particularly those with heavy beading, leather trim, or complex construction — really do need a professional touch.
I use home dry cleaning for about 80 percent of my dry-clean-only items and save the professionals for special pieces and stubborn problems. That balance works well for both my wardrobe and my budget.
Frequently Asked Questions
Can I really dry clean at home without a kit?
Yes, you can. Hand-washing with a gentle detergent designed for delicates, followed by careful air drying, works well for many fabrics labeled dry clean only. A garment steamer is also a great tool for freshening clothes between full cleanings. The results won't always match professional service, but for routine care, home methods are effective.
Is at-home dry cleaning safe for silk?
At-home dry cleaning is generally safe for silk when done correctly. Use a gentle detergent, cool water, and avoid wringing or twisting. A dry cleaning kit with a low-heat dryer cycle is also safe for most silk garments. Always test a hidden area first, and skip the process if the silk is heavily embroidered or very delicate.
How often should I dry clean clothes at home?
Most garments only need cleaning after a few wears, unless they're visibly soiled or have absorbed odors. Over-cleaning wears down fibers faster than necessary. For items like blazers and trousers, every three to five wears is a good rule of thumb. Sweaters and knits can often go longer, especially if you air them out between wears.
Will home dry cleaning remove tough stains?
Home methods can handle many common stains if you treat them promptly, but they're not a substitute for professional stain removal on set-in or heavy stains. The sooner you address a stain, the better your chances of removing it. For large or stubborn stains, a professional cleaner has specialized solvents and equipment that home methods can't match.
Can I use a regular iron instead of a steamer?
You can, but be cautious. A regular iron can scorch or shine delicate fabrics like silk and wool. If you use one, always set it to the lowest heat, use a pressing cloth between the iron and the fabric, and keep the iron moving. A handheld steamer is much safer and easier for most delicate garments.

Final Thoughts
Learning how to dry clean clothes at home is one of those skills that pays for itself almost immediately. You save money, you gain control over how your delicate garments are treated, and you reduce the stress of last-minute trips to the cleaner. Whether you use a kit, hand-wash with care, or rely on a steamer, the key is patience and attention to detail.
Start with one or two pieces you're comfortable experimenting with, and build your confidence from there. Before long, you'll wonder why you ever spent so much time and money on professional cleanings for everyday pieces. Your wardrobe will thank you, and your wallet will too.
If you found this guide helpful, feel free to leave a comment with your own tips or questions. I'd love to hear about your experiences with at-home dry cleaning and what has worked best for you.